How to Clean and Sanitize Your Toothbrush
Oral hygiene serves as a fundamental cornerstone to overall wellness, and a key element of this regimen is a clean toothbrush. Designed to scrub away damaging plaque and bacteria from our teeth and gums, it is crucial that this vital tool stays germ-free itself. An unclean toothbrush can serve as a breeding ground for harmful microorganisms, including bacteria, mold, and yeast. Therefore, we must ensure the regular sanitization of our toothbrushes, just as we maintain the cleanliness of other personal hygiene items. Dive into this informative guide, where we delve into the importance of a clean toothbrush, effective sanitizing methods and tips on proper storage post-sanitization to provide a comprehensive understanding of this often overlooked aspect of oral health.
Understanding the importance of a clean toothbrush
There’s something that often gets overlooked in our daily hustle and bustle of establishing a family routine and running a household. Yes, you guessed it right – it’s the toothbrush! This tiny tool holds tremendous responsibility to maintain our family’s oral health, but how often do we remember to clean and sanitize it? Not merely rinsing it under the tap after use, but a thorough cleaning. Grab a cup of coffee and let’s delve into this.
First and foremost, your toothbrush is a hotspot for germs. Think about it; we use it to clean the insides of our mouths, which, let’s be honest, aren’t always germ-free (despite our best intentions!). You might be surprised, but research shows that millions of bacteria, including E. coli and staph, can be harboring on your toothbrush. That alone makes it worth taking the extra time to clean and sanitize.
Still not convinced? Here’s another compelling reason – cold and flu germs. Yes, the ones causing the sniffles and fever can survive on a toothbrush for more than 24 hours. For a family where one member has fallen prey to the flu, not sanitizing toothbrushes might just keep this unwelcome guest circulating around the family.
The benefits of keeping our toothbrushes spick and span extend beyond just the health realm. Regular cleaning and sanitizing can help extend the life of your toothbrush, meaning less frequent replacements and more pennies saved for that family adventure you’re planning.
So, how often should we clean and sanitize? Well, ideally, the toothbrush should be cleaned intensively every week, considering our lovable tiny bristles deal with bacteria every day.
Cleaning it might be easier than you think, and no, you don’t need any fancy cleaners. Good ol’ vinegar or peroxide can do pretty well! To sanitize, just soak the toothbrush-head into the vinegar or peroxide for about 30 mins. Then simply rinse it under cold water, and you’re done!
In the case of illness, it’s recommended to sanitize the toothbrush every day till the person recovers completely. Also, consider replacing toothbrushes after illnesses to take that extra step against viral or bacterial transmission.
Remember, while we all focus a lot on healthy eating and cleanliness around the house, the minor details like toothbrush hygiene are equally significant. When it comes to safeguarding our family’s health, it’s these little habits that add up to make a substantial difference. Keep those bristles clean, and here’s to healthy smiles all around the family!
Methods of sanitizing a toothbrush
Different Methods to Safeguard Your Smile – Sanitizing Your Toothbrush
After emphasizing the significance of toothbrush cleanliness and the far-reaching health implications it carries, it’s time to dive into the array of methods available for sanitizing your toothbrush effectively. It’s worth noting that there isn’t one universally best method. What works for one family might not work for another. Therefore, it’s essential you pick a method that aligns with your personal preferences and budget. Let’s leap into the diverse ocean of choice!
- Using UV Light Sanitizers:
UV light sanitizers have gained prominence due to their efficiency in annihilating germs. This method involves utilizing a device specifically designed for toothbrushes, where you place your toothbrush inside, and harmful germs are obliterated by UV light cleaning. It’s easy and quick, but it does have a cost attached to purchasing a quality UV light sanitizing device. - Hydrogen Peroxide Soak:
Hydrogen peroxide has powerful anti-bacterial properties. Create a 50/50 solution with equal parts hydrogen peroxide and water, then let the toothbrush bristles soak for about 5 minutes before rinsing thoroughly. While it’s cost-effective and quite effective, remember not to do this frequently, as constant exposure to hydrogen peroxide might deteriorate your bristles. - Anti-bacterial Mouthwash:
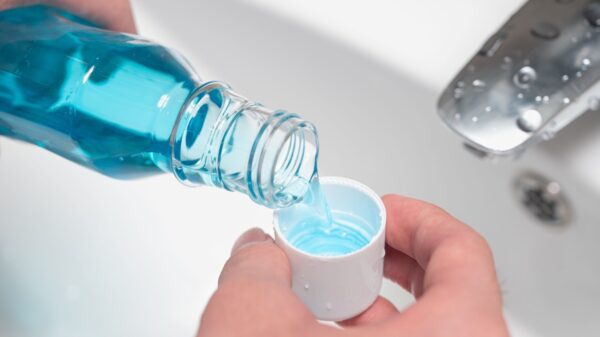
Certain types of anti-bacterial mouthwashes can be used to sanitize your toothbrush. Fill a small cup with mouthwash and let your toothbrush soak for a couple of minutes. However, be cautious as some mouthwashes may contain ingredients that can weaken your toothbrush bristles. - Vinegar Solution Soak:
A safe and natural alternative is to soak your toothbrush in a white vinegar solution. Mix equal parts vinegar and water, let it soak for 30 minutes, and then rinse thoroughly. Vinegar’s antibacterial properties are fantastic for neutralizing bacteria, but some people might not prefer this option due to vinegar’s distinctive smell. - Dishwasher Clean:
Modern dishwashers often have hot and sanitized settings guaranteed to kill germs on dishes and utensils. Toothbrushes are no exception. Place it in the utensil section of a dishwasher and let the machine do its work. This method is a time saver, but do check beforehand whether your toothbrush is dishwasher safe.
Safety tip: Regardless of the sanitation method you choose, it’s crucial to rinse your toothbrush thoroughly with tap water after cleaning to ensure there are no sanitizing product residues left behind.
Now, incorporating one of these sanitizing methods as a part of your toothbrush hygiene routine should be a breeze. Remember, cleanliness starts at home, and the most microscopic efforts can make a significant difference in family health. Here’s to bright smiles and healthier routines!
Proper care and storage of toothbrushes post-sanitization
As a dedicated guardian of your family’s health, you’ve already taken heed of toothbrush hygiene; focusing on regular cleaning and sanitizing. Now, let’s delve a little deeper and address the aftercare of your freshly sanitized toothbrush. The right way to store your toothbrush is indeed a vital part of overall oral hygiene that leads to healthier, happier families.
Begin with shaking off excess water post-sanitizing. A toothbrush should always be stored upright to allow it to air-dry after you’ve adequately cleaned it. The upright storage prevents water from pooling at the handle, which could potentially encourage the growth of bacteria, defeating the entire purpose of sanitizing.
Speaking of bacteria, avoiding cross-contamination is crucial. When multiple toothbrushes are stored together, there’s a threat of germs jumping from one toothbrush to another. Combat this issue by not allowing toothbrush heads to touch in a shared holder, or better yet, use separate holders for each toothbrush.
Damp and dark environments, such as closed medicine cabinets or bathroom drawers, are the playgrounds for bacteria growth. Storing your toothbrush in open air is recommended to inhibit bacterial growth and ensure proper drying. However, be mindful of its placement; too close to the toilet may expose it to aerosols from flushing.
A toothbrush cover might seem like a good safeguard for your brush, protecting it from airborne bathroom particles. However, it’s not recommended for regular use. A cover creates a moist environment, perfect for bacterial growth. If traveling, use a cover for transport then remove it once you reach your destination.
Consider storage in a UV toothbrush sanitizer holder, which not only stores your brush but also continues to kill microorganisms between oral hygiene sessions. Alternatively, use a toothbrush stand that allows proper air circulation to facilitate drying.
Do ensure the cleanliness of the storage surface itself. Whether it’s a toothbrush stand, cup or holder, it needs to be washed regularly to prevent build-up of toothpaste residue and dust.
Storing your toothbrush properly after you’ve sanitized it is indeed a key step often overlooked in toothbrush hygiene. It not only aids the longevity of your toothbrush but also ensures that you are reaping maximum health benefits from your oral hygiene efforts. With something as simple as tweaking the way you store your toothbrush, you help to safeguard the health and wellbeing of your loved ones, creating a healthy, brighter, and happier home.
Ultimately, a meticulous approach to maintaining a clean toothbrush can significantly enhance our oral health, preventing infections and ensuring a healthier mouth. We’ve covered the crucial nature of this practice in detail, explored diverse sanitizing techniques like the usage of antibacterial mouthwash, hydrogen peroxide solution, or a UV toothbrush sanitizer, and have outlined post-sanitization care. Encouraging the savvy storage of your toothbrush, including proper drying, upright positioning, and avoidance of contact with other brushes, is equally pivotal. Let this serve as a guide in your ongoing pursuit of optimal oral hygiene, illustrating how a few small changes to the way we handle and store our toothbrush can result in profound benefits.


